What Do Flowers Do?
LESSON 5
Children explore how flowers help plants grow and then add a flower to complete their art project.
The book “The Reason for a Flower” by Ruth Heller
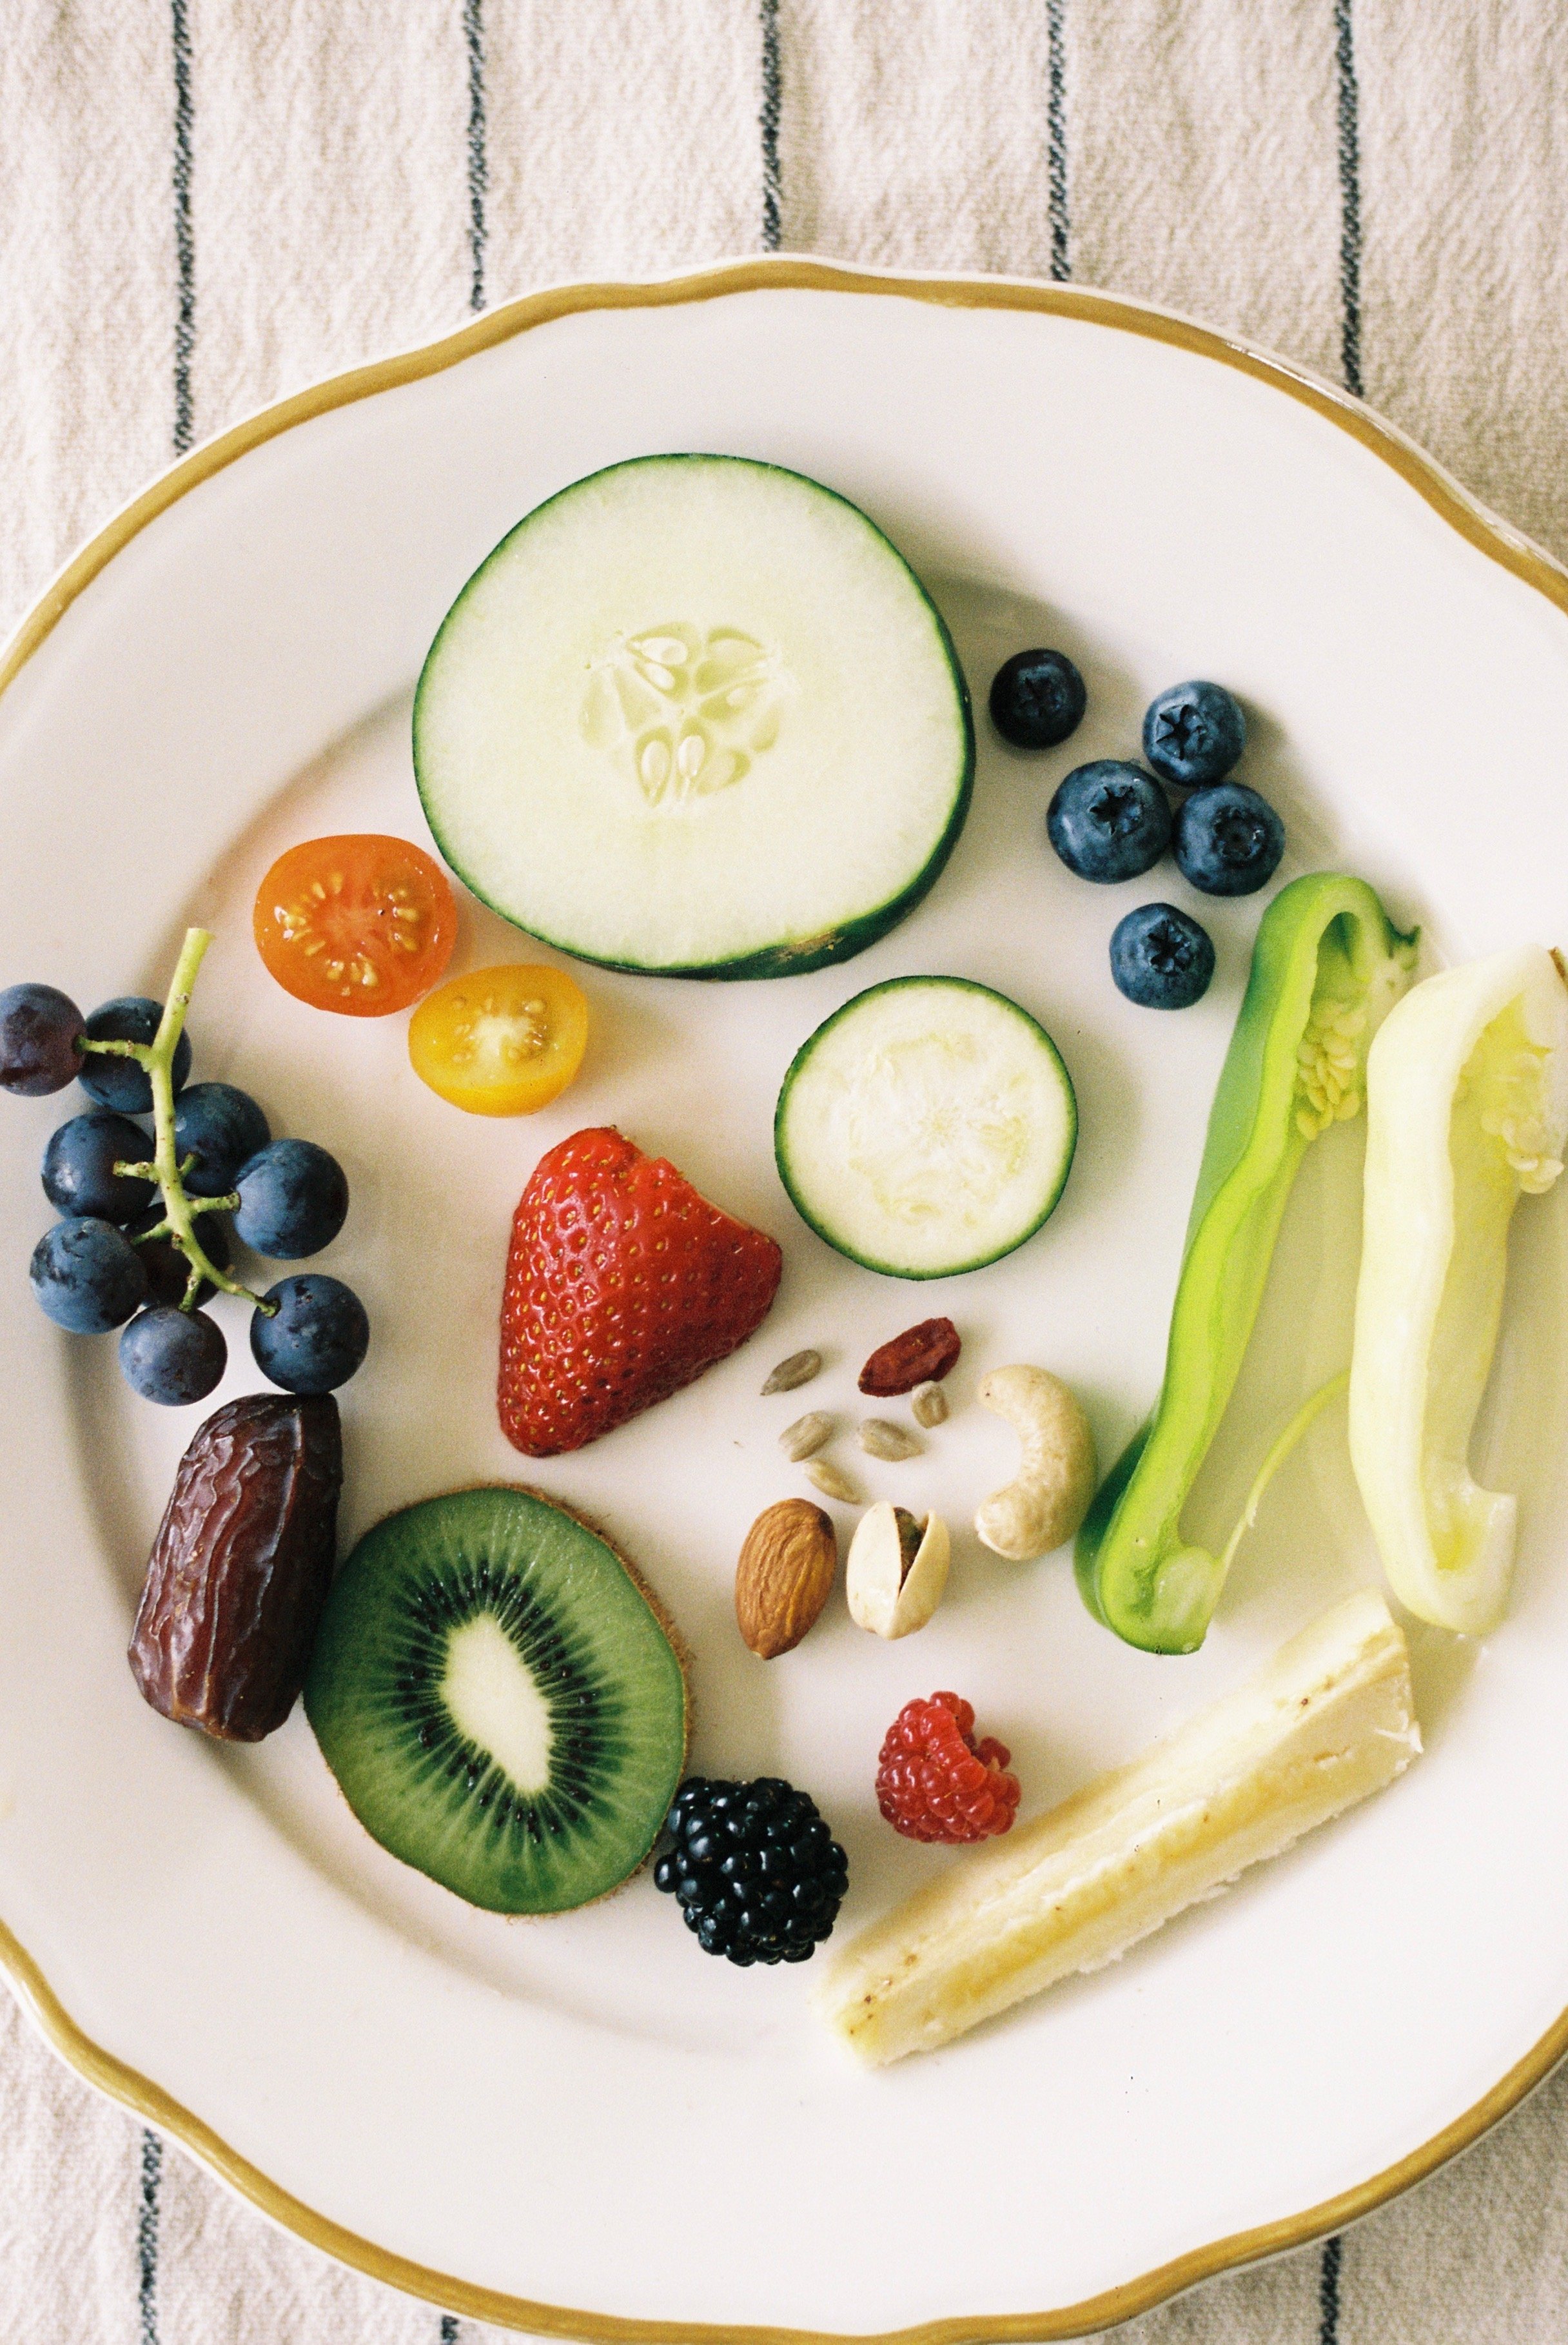
Different kinds of fruits like avocado, strawberry, pear, peas, squash, etc.
A seed packet (optional)
Knife
Cutting board
Materials
Preparations
Collect items that come from a flower such as a few different kinds of fruit, flowers that contain seeds or a seed packet. Another option is to get some alstroemeria flowers, they can usually be found at your local grocery store. The green pod that connects the stem to the flower can carefully be cut open and you can see the ovules (which turn into seeds when fertilized).
Take the items you collected and put them in a bag or basket.

Assist children in cutting or dissecting fruit so they can explore the seeds within.
Engage children in a discussion about how to story and activity are related.
Encourage language development as
you ask children questions and engage
them in discussion about flowers.
Encourage creativity as children add to their plant artwork.
Objectives for Teachers
Objectives for Children
Investigate items that come from flowers.
Use scientific thinking and inference to determine what items have in common.
Engage in the story and make connections between it and their real-life investigation.
Access their creativity as they add to their flower artwork.

Collect and Connect
Practice saying the poem “Dig a Little Hole,” together with the actions you came up with.
Dig a Little Hole
Dig a little hole,
Plant a little seed.
Pour a little water,
Pull a little weed.
Chase a little bug,
Heigh-ho, there he goes!
Give a little sunshine,
Grow a little rose.
Activity Flow
Start this lesson by reflecting on the previous lessons. You could display your child’s artwork and ask them to tell you about each part of the plant learned about so far. Or check in on your experiments from lesson one. Some questions you might ask:
What do the roots do?
How do roots help the plant grow?
How to leaves help the plant grow?
2. Next, ask your child if they can think of another part of the plant that we haven’t learned about yet. Share that today, we will be learning about why plants have flowers. Ask your child what they know about flowers and allow them to share.
3. Show your child the bag or basket of items you collected. Tell them that all these things have two things in common. Explain that “in common” means the same. Then tell them that one thing they have in common is that each item came from a flower. (If your child needs help understanding how these items came from flowers, here is time lapse of a growing apple. It’s easy to see how the blossom loses its leaves and then grows into the apple.) Now it is their job to figure out the second thing they have in common.
4. Have your child pull out the items and explore them. Encourage them to cut open the pieces of fruit with a child safe knife. Allow them to cut open the flower if you have one and explore the seeds from packets. If you have alstroemeria, carefully cut it open and observe. Ask your child what they notice about all of these items. If needed, point out that all of the items have seeds as the second thing they share in common.
5. Next, ask your child if they can remember what seeds do. Refer back to the first lesson if needed.
6. Ask your child if they can guess why they think plants have a flower. Encourage them to think about the activity that they just did, then introduce the story “The Reason for a Flower” by Ruth Heller. Tell them that this story will teach us about flowers and why they are so important for plants to keep growing.
7. After the story, initiate a discussion about the reason for flowers:
Why do plants have flowers?
Why are animals and insects important to flowers?
What similarities did you notice between the story and the activity we just did?
8. Conclude the lesson by adding a flower to complete the art project.