Soil Composition
LESSON 2
Children observe the layers in their soil sample and learn about each one while making a yummy snack.
Soil samples from previous lesson
Access to digital or printed soil composition template
Clear cup for each child (we used glass cups)
Cereal, chocolate chips, or roughly chopped nuts
Graham crackers (crushed)
Chocolate pudding
Optional: coconut shreds colored green, green sprinkles, crushed Oreos and gummy worms
Spoons
Materials

Put the graham crackers in a bag or bowl and crush them finely to resemble silt (children can also help with this step).
If using coconut shred, dye them green by placing them in a Ziploc bag or a bowl and adding a few drops of food coloring. Shake the bag or bowl until the shreds are evenly coated, then allow them to dry.
Gather all other materials for the snack.
Preparations
Encourage the use of new vocabulary about soil composition through teaching and modeling the use of new words.
Promote interest and curiosity about soil and its many parts.
Assist children as they crush, pour, and mix their snack together.
Foster a sense of wonder and awe of the natural world.
Objectives for Teachers
Children reflect on their learning as they answer questions about the previous lesson.
Children make observations about soil, noticing changes and similarities.
Children explore the concept of soil layers using a variety of senses.
Children improve listening skills by learning to follow a multistep direction as they make a snack.
Objectives for Children

Collect and Connect
Practice saying the poem “Dirt on My Shirt” together with the actions you came up with.
Dirt on My Shirt
By Jeff Foxworthy
There’s dirt on my shirt,
And leaves in my hair.
There’s mud on my boots,
But I don’t really care.
Playing outside is so much fun,
To breathe the clean air,
And feel the warm sun.
To stomp in a puddle,
Or climb a big tree,
Makes me quite happy,
Just look and you’ll see.
Activity Flow
Begin by reflecting on the previous lesson by asking some questions to spark your child’s memory:
What are rocks and minerals?
How do rocks and minerals turn into soil?
What do you remember from the story?
If you wrote down any wonders or questions in lesson one, take time to revisit them.

2. Next, check on your mason jar with dirt and water. Observe how the soil looks and ask your child what they notice about the soil. Hopefully there are some distinct layers visible in the jar. If it’s hard to see, refer to the soil composition template.
3. Tell your child that you are going to learn about each of those layers today by making a yummy snack to resemble the layers. The soil sample should show sand at the bottom, followed by silt, then clay, and finally organic matter on top. Here is some helpful information about each soil layer that you can discuss with your child as they prepare their snack:
Sand: Sand is like tiny, gritty pieces. It feels rough and is often found on the beach or in sandboxes.
Silt: Silt is like soft, powdery dirt. It feels smooth and can be found near rivers or lakes.
Clay: Clay is like sticky, moldable dirt. It feels gooey when wet and is used to make pottery or bricks.
Organic Matter: Organic matter is material that is living or used to be alive. Such as grass, leaves, roots, and bugs.
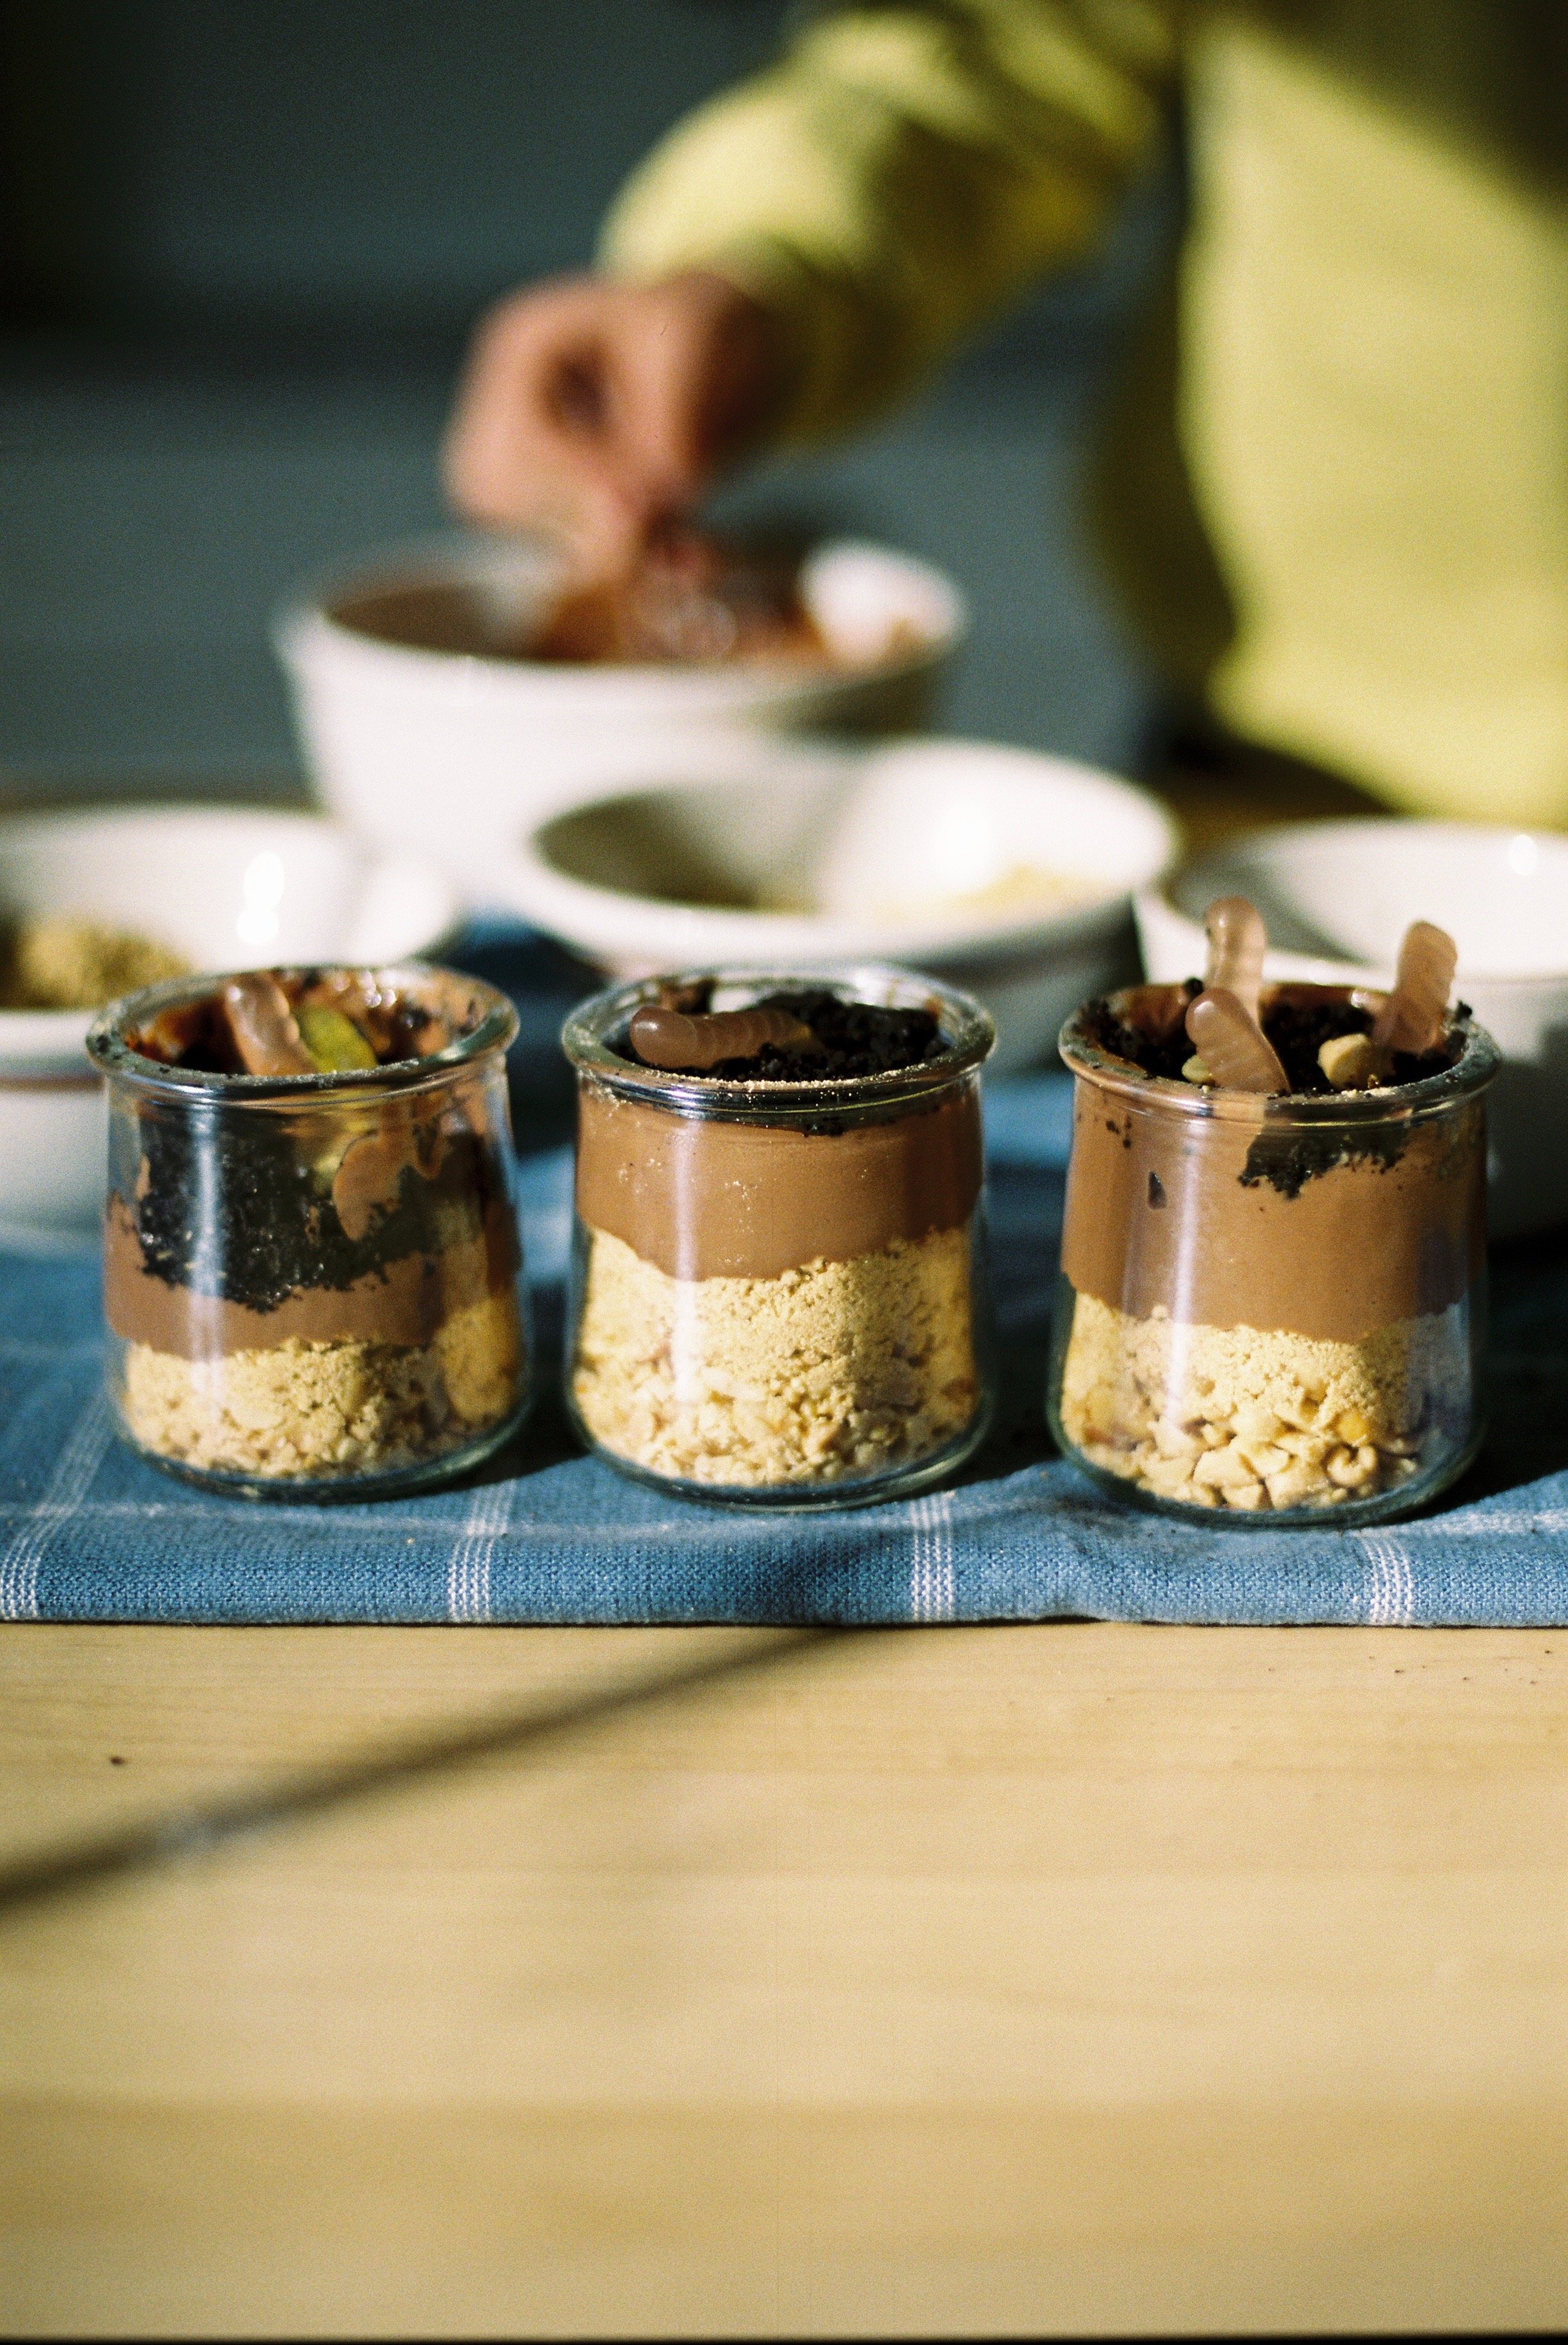
Soil Composition Snack:
Fill the bottom of your clear cup with either cereal, chocolate chips, or roughly chopped nuts to represent sand.
Layer crushed graham crackers on top of the sand to represent silt.
Add pudding on top of the silt.
Sprinkle coconut shreds or sprinkles on top of the clay to represent organic matter. Optionally, add worms and crushed Oreos as well.
4. Before enjoying your snack, ask your child to compare it to the jar of soil. Encourage them to match each layer of their snack to the corresponding layer in the jar. Then, grab a spoon and dig in!


