Animal Art
LESSON 6
Children practice artistic expression through creating animal artwork.
Cardboard or watercolor paper
Acrylic or watercolor paint
Scissors
Glue
Materials
Gather materials.
Prepare a space to create artwork.
Preparations

Facilitate movement activity using animal movement cards.
Provide guidance and support during the art activity.
Lead reflective discussions about the students' favorite activities, promoting active listening and communication skills.
Assess student understanding of animals through observations during activities and participation in discussions.
Objectives for Teachers
Objectives for Children
Engage in movement activities using animal movement cards.
Create animal artwork using cardboard, paints, and other materials, fostering creativity and fine motor skills.
Participate in discussions about their favorite activities, promoting reflection and communication skills.
Develop an appreciation for nature and animals through artistic expression and reflection on their learning experiences.

Collect and Connect
Practice saying the poem ‘Animal Movements’ together with the actions you came up with.
Animal Movements
Snakes slither,
And cat's creep.
Spiders spin,
And leopard's leap.
Turtles trudge,
And bunny's bounce.
Falcon's fly,
And panther's pounce.
Hummingbird's hover,
And fish flop.
Gulls glide,
And rabbit's hop.
-Leslie Tryon
Activity Flow
Begin this lesson with the movement activity you ended on in the previous lesson. Use your animal movement cards and practice the poses you came up with for each one.
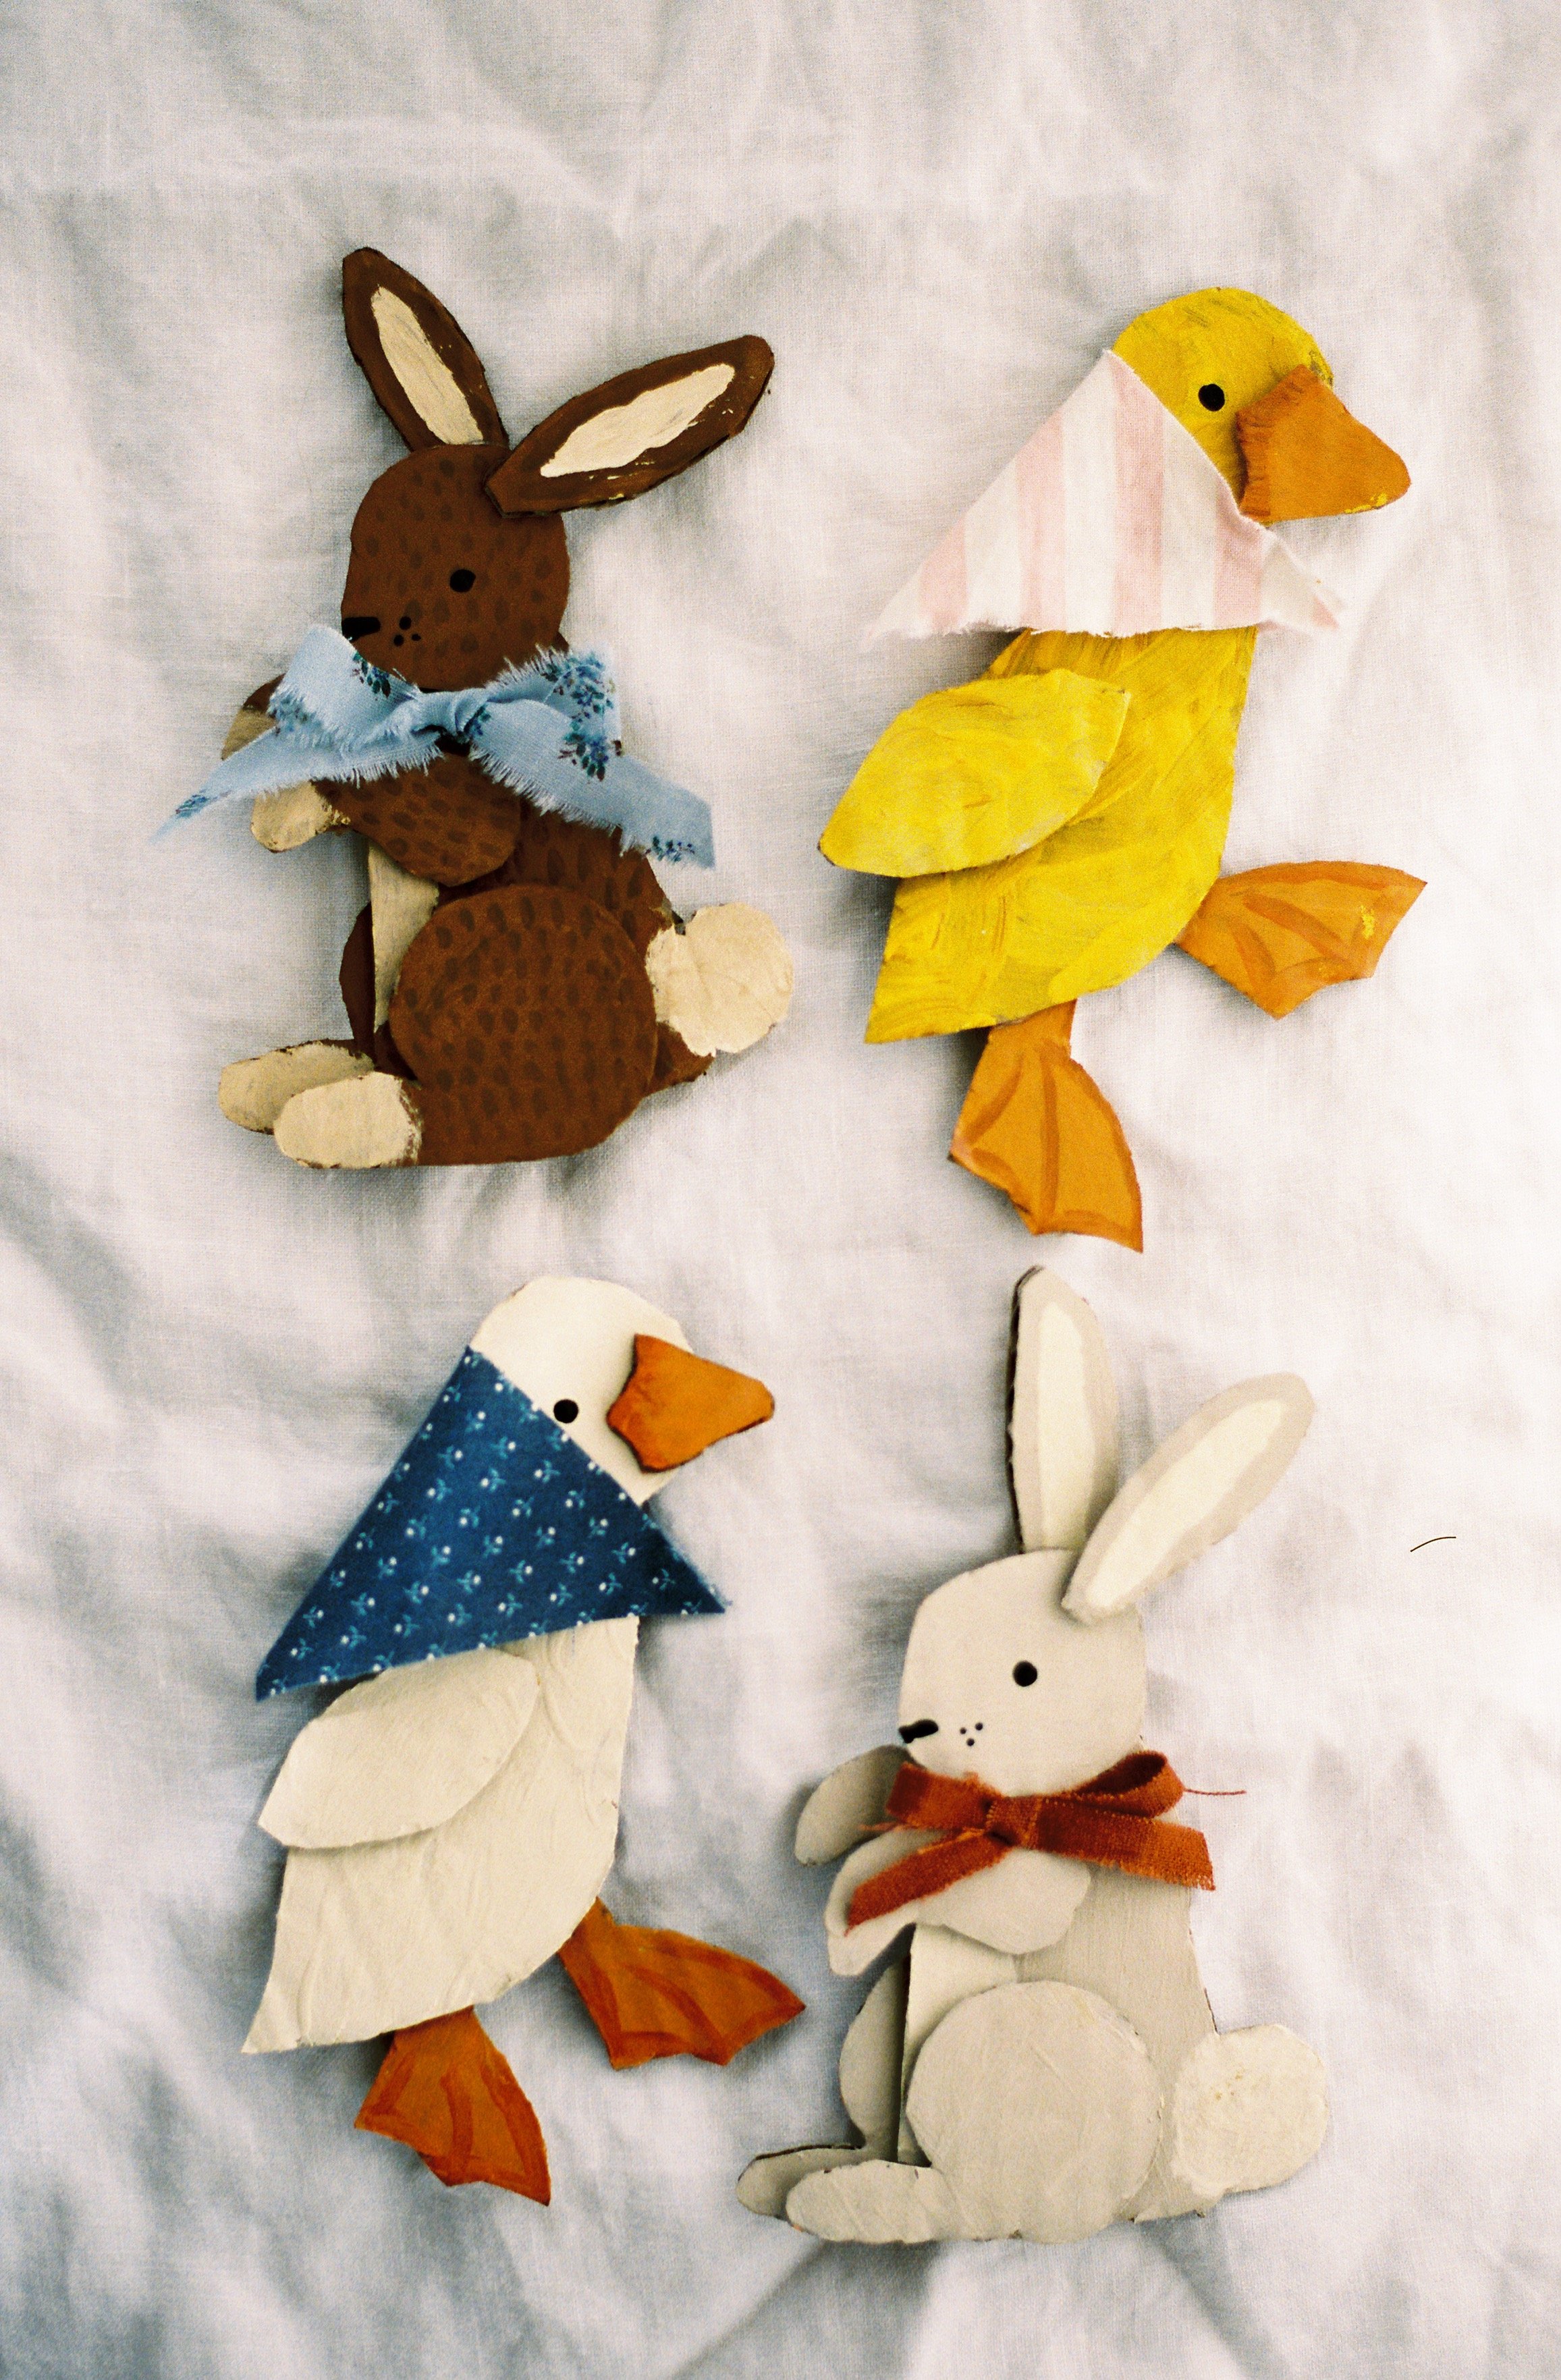
Tell your child that today you'll be creating animals using cardboard and paints. Take a moment to find inspiration for your artwork. You can look at illustrations in stories for ideas. If you don’t have any books with animal illustrations on hand, you can find inspiration online, perhaps on Pinterest.
Once you have an idea of the animals you'd like to create, work together to sketch and cut out the general shapes of the animals using cardboard or cardstock paper. Depending on your child's age, you might do this while they watch. Once finished, cut out the shapes. Alternatively, you could have your child paint the paper or cardboard first and then cut the shapes out of the already painted material.
Take your shapes and paint them the color you’d like. After the first layer has dried, you can add additional layers and details.
Glue together the shapes so they resemble the animal. You can add some fun spring accessories using fabric scraps if you like.
Feel free to add any additional touches to your final creation. A popsicle stick could easily turn them into puppets for open-ended play! Display or enjoy playing with the baby animal artwork you’ve created together.
Conclude the unit by initiating a conversation. Here are some questions you might ask:
Which activity did you enjoy the most: the field trip, movement activities, art projects, or something else?
Which animal did you find the most interesting, and why?
What did you learn about how animals move and play?
How did you feel when we were doing the art activity creating animals?
Did you have any favorite stories or books we read together during this unit?
What was the most exciting thing you discovered about baby animals?
Is there anything else you'd like to learn about animals in the future?